This post wanders quite off topic… but has a lot of pretty pictures indeed 😉
Sometimes I ask myself why I am a software developer, the answer in the end is that I always enjoyed creating things, whatever it is going from being sketched out totally in my imagination to finally seeing it in the flesh. Writing software, especially graphical software can be very satisfying exactly because of this mental process of seeing the thing you thought about slowly forming and starting to actually working, with the gap between the mental image and the real thing narrowing more and more (yeah, I’m one of those heavy visual thinkers that can think almost exclusively by images).
But sometimes nothing can replace the satisfaction to create an actual, beautiful object, and I also feel manual skills are something that we should cultivate much more, I feel more complete if every now and then I do something that a) I don’t know anything about when I start and b) it’s a difficult manual skill to craft.
That’s also why before drawing the svg for the Kirigami banner

I “had” to make some experiments of an actual kirigami…

But this post is not about that.
Almost a year ago, a friend of mine told me that he wanted to learn a bit to hack on some simple Arduino stuff, and you know what? I wanted too.
I have this stubborn quality that makes me to go quite overboard when I decide to do something (especially if is not for myself) and not to stop until is done, actually useful and pretty, so if we are doing some Arduino project, let’s do something that has an use and that will be pretty… and that’s how the project “Bagnur” started (means watering can in Piedmontese language).
The project is one that is seen again and again on the interwebs, so is just a remix of existing ideas rather than something truly innovative: the Arduino takes data from a soil moisture sensor (different humidity in the soil changes current conductivity), to figure out how much water the soil of a potted plant has.
When is dry enough it opens a solenoid based valve to pour enough water in, and the moisture sampling goes on and on, hopefully stopping you from killing those poor potted plants from thirst after forgetting watering them for days 😉
The moisture sensor is based on the LM393 chip, the solenoid valve is similar to this one (hilariously overspec for this project, love this kind of overkill).
So we know the Arduino output pins have a too weak current to operate the valve, it will have to be powered separatedly: the Arduino will close its circuit with a transistor, I had just salvaged an E13007 NPN transistor that had useful charateristics (low base-emitter saturation voltage, resists quite heavy loads) from a broken ATX power supply.
This makes things a bit more interesting, luckily in the end a single power source was enough to power the Arduino and the valve in parallel, probably not particularly recomended, but cheap and compact (having 2 different power bricks for such a sillyness wouldn’t have been particularly fun for day to day use).
To make the project a bit more interesting, we have a potentiometer that will regulate how much water the plant needs, different plants, different needs and one of those pretty RGB LEDs, that will be the “output UI” of the thing.
The state of the led will be:
- Fading from pure red (soil bone dry) to pure green (soil soaking wet) with all the values in between
- Fading to blue when the valve is open, and the plant is being watered
- The LED will stay usually at a very low power, the sensor will do a reading every 10 seconds or so, when this happens the LED will fade to full power with a nice animation
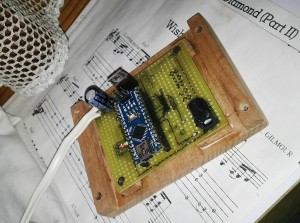
For the final thing, I decided to use an Arduino Nano compatible board, based as well on the ATMega 328 chip, since I don’t need many pins or performance, it just has to be as small, low power and cheap as possible.
In this Github repo there are both the source code of the program running in the arduino and a couple of schematics drawn with Fritzing, so it should be of easy replication and improvement… if someone really wants to 😉
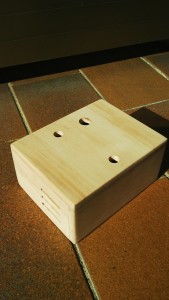
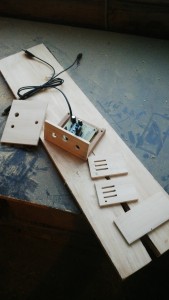
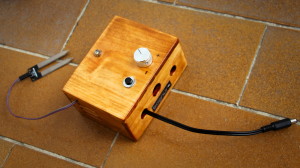
The final board will be in an hand-made case made of wood that gives it a cool almost “steampunk” look: that was honestly for me the most fun part of the project of all, probably because was the farthest from what I usually do, the most low-tech, hand skill demanding part (and slightly dangerous… yep, it involves rotating blades :p).
Video of the thing in action
This videos shows some assembling steps and the thing in action, both opening the valve automatically based on the moisture sensor values and manually with the button on top.
Board
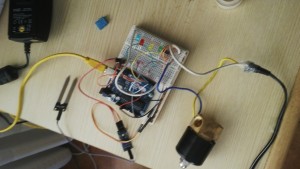
Let’s start from the usual prototyping with the classic Arduino Uno/breadboard combination (here still with different colored leds instead of the final single RGB one)
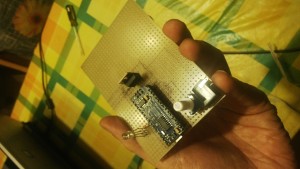
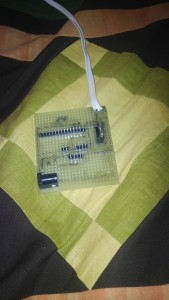
After the breadboard prototype is done, let’s start to lay out the components on a perfboard, to make it look more like a final prototype, usable day to day
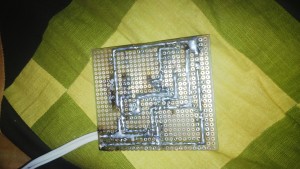
Yep!, i definitely need to improve my soldering skills, but I swear, even if is kinda ugly, it works like a charm 😉
Woodwork
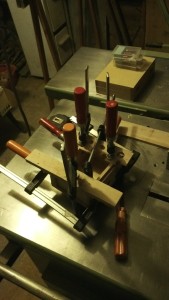
As I mentioned, for me the most interesting part was to build a wooden case from scratch, from a raw plank of wood, trying to master some of the classic woodwork tecniques.
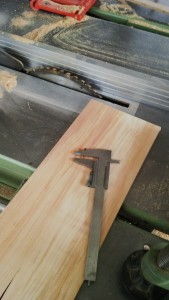
This is a Combination Machine, I show here some of the steps of the use of the thickness planer and the table saw.
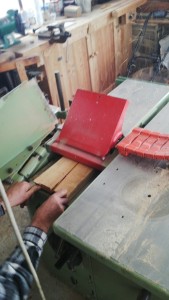
The plank is made thinner and smoother via a thickness planer; after this step the setup of the machine changes becoming a surface planer for a more precise and smoother retouching. The process repeats until the wood reaches the desired thickness.
…But some aggressive sandpapering for sure helps, best if done with a Sander
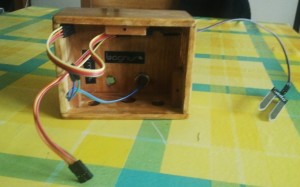
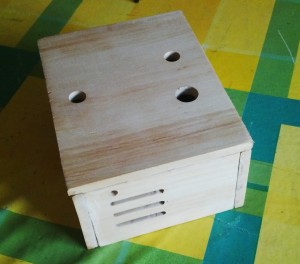
The lid of the box with a translucent, water proof paint, attached to the top are the moisture sensor, the RGB LED and a button to manually open the valve.
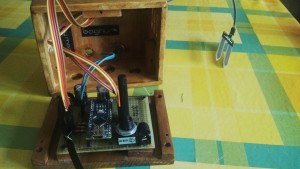
The complete device, ready to be closed. The wires on the left control the RGB LED, the blue and green wires in the middle control the button, the wires on the right control the moisture sensor.
It has been an insanely fun project, and I am sure my technique can still improve in all areas (designing an electronics board, soldering, woodwork…). If I’ll keep trying to improve with new projects I don’t know yet, but the recomendation I can make is get out of the comfort zone of your day-to-day work and experiment: you have only to gain, if only for the act of doing things wrong, without which there is no learning.


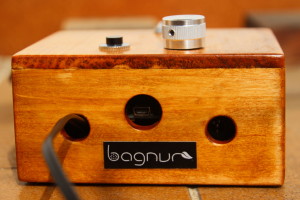
Wow, really really cool! And yes, it does look beautiful!
Do you still know how much you paid in total for the material (and for using the woodwork machines if you had to pay for that)?
> Do you still know how much you paid in total for the material (and for using the woodwork machines if you had to pay for that)?
For the electronic components maybe 20 eur or less (they are ridiculously cheap)
I have free access to those machines so I don’t know how much would cost renting their use (or the legality of it as they are a bit dangerous so i guess some sort of insurance would be needed)